Growing guide
How to grow hostas
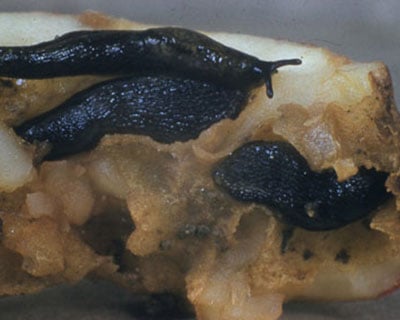
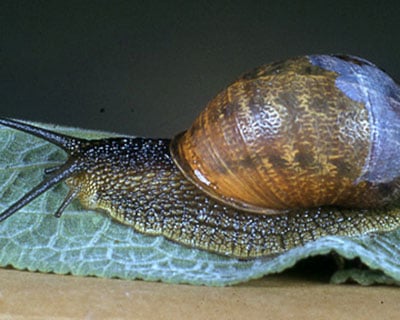
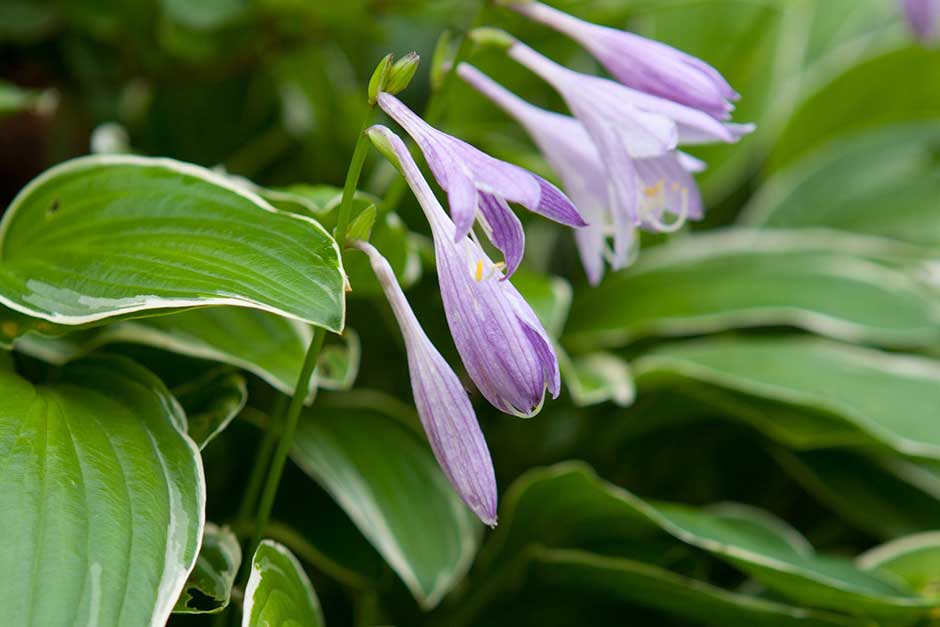
These shade-loving plants are primarily grown for their beautiful foliage. There's a vast range of cultivars to choose from, with leaves in all shades of green, as well as dusky blues and acid yellows, sometimes variegated or flashed with cream or gold, ruffled, smooth or distinctively ribbed. Many also produce small trumpet-shaped mauve or white flowers in summer. Hostas are notoriously irresistible to slugs and snails, but are also much loved by gardeners, who often amass large collections.
Quick facts
- Easy to grow
- Bold foliage from spring to autumn
- Plants last for many years
- They love shade
- Plant in spring and autumn ideally
- Tidy up dead foliage in late autumn
- Make new plants by division in spring or autumn
All you need to know
Choosing hostas
Hostas are one of the best foliage plants. They are easy to-grow-plants and long-lived.
There is a wide range of hostas, which vary in leaf shape, size and colour. With a such huge range of leaf shapes, sizes and colours, choosing a hosta is mainly a matter of personal taste. However, it’s also wise to match the plants to the conditions you have in your garden. In general, most thrive in moist soil in light to medium shade. However, blue-leaved hostas flourish in light shade, while yellow-leaved ones prefer some sun.
Miniature types such as ‘Blue Mouse Ears’ or ‘Pandoras Box’ are a good choice if space is tight or for containers.
Most also produce clusters of flowers in shades of white, lavender and purple on tall stems.
Buying Hostas
Plants are sold in pots ready for planting and available in leaf from spring to autumn in garden centres and online. To track down specific ones you can use the RHS Find a Plant.

Buying plants by mail order
When should I plant?
You can plant hostas at any time of year, but it’s best to avoid mid-summer when temperatures are high and the soil is often dry due to little rainfall.
Where should I plant?
All hostas give their best in moist soil in partial shade, whether in the ground or a container. In general, though, yellow-leaved cultivars prefer some sun, along with a few hosta that are tolerant of sunny conditions.
Hostas like fertile soils including heavy clay, improved with the addition of garden compost or well-rotted manure. On drier soils, try hostas with thicker, waxier leaves as they are more tolerant. Unfortunately, hostas are not really suitable for dry soils or exposed, windy areas of the garden.
We have put together a guide to help you identify you soil type:

Identifying your soil type
How do I plant hostas?
How you plant hostas will depend on where you’ve decided to grow:
In borders
Hostas are easy to plant and it takes just a few minutes. They are planted in the same way as other herbaceous perennials, but here are a few extra tips:
-
Space plants up to 90cm (3ft) apart, depending on their ultimate height and spread (check the label and plant bigger ones further apart)
-
Dig a planting hole the same depth as the root ball and twice as wide. Tease out (use your fingers to loosen) the roots and place in the hole before drawing back the soil and firming with your fingers
-
Water in the plant to settle the soil and continue watering regularly, especially in dry weather, during the first summer. Mulch with well-rotted organic matter such as well-rotted garden compost or manure to conserve moisture

Planting perennials
Planting perennials

Planting perennials
In Containers
Hostas can be planted in large containers 30-45cm (1ft-18in) in diameter. Choose a container with drainage holes. Use a peat-free multipurpose or loam-based potting compost such as John Innes No. 3. Plant the hosta so the top of the rootball sits at the same level it was in its previous pot. Water well and continue watering regularly when in leaf.
Miniature Hostas
Miniature hostas need good drainage and will do best in soil improved with the addition of grit and garden compost. They are also suitable for rock gardens or containers and troughs. Mulching round plants with a layer of gravel not only looks good but also keeps soil from splashing up and spoiling the leaves.
You can also plant miniature hostas successfully in containers (as above) for a diminutive display.

Rock gardening
Rock gardening

Rock gardening
Watering
Hostas in the ground may need watering in dry spells – aim to keep the soil at least slightly damp to a depth of 15cm (6in) – check by digging down nearby if needs-be.
Plants in containers need regular watering in summer as they dry out quickly. Plants that dry out will brown along the leaf margins.
Feeding
In borders: In fertile soils an annual mulch of garden compost or well-rotted manure is all the feeding necessary. On poorer soils apply a general purpose fertilizer, such as Growmore, at the manufacturers recommendation in early spring and then mulch. This together with adequate moisture will ensure large, healthy foliage.
In containers: liquid feed once a month when it’s in growth, using a general-purpose liquid fertiliser such as Phostrogen, MiracleGro or Seaweed feed.
Deadheading
The flower stalks can be left in place until plants are tidied up in late autumn when the leaves naturally die back. Alternatively, they can be removed once the blooms fade to save plants wasting energy on seed production.
Overwintering
Hostas are fully hardy but foliage dies back in late autumn and the plants remain dormant until mid-spring. New leaves emerging in spring can get damaged by frosts. You can protect with 2 or 3 layers of horticultural fleece if frost is forecast – however this one is really just for the very keen gardener.
Top tip
Plants in containers are susceptible to waterlogging. Protect containers from winter rain by standing them at the base of a wall or fence as this is naturally drier.
Caring for older plants
Hostas eventually make large clumps and benefit from dividing every 4-5 years (see propagation as the method is just the same).

Perennials: cutting back
Dividing clumps
You can easily make more hostas by dividing large clumps in autumn and early spring.
- Lift the clump from the border with a fork, or tip out from containers, taking care not to damage the growing points on the top
- Place the clump on a board or plastic sheet on the border, lawn or hard surface
- Divide by chopping through with a sharp spade or an old kitchen knife, cutting down between the shoots
- Make sure each piece has between 1 and 3 good buds and trim away damaged roots with a knife
- Ensure the divisions are replanted at their original depth in the ground with the shoots just poking through the soil surface
- Water the plants and apply a granular fertiliser such as Growmore in spring at rates on the packet
Plants grown from divisions will be identical to the parent plant and should flower from their second year.

Dividing perennials
Growing from seed
Hostas can be grown from seed collected in the autumn from dry seed heads. Sow in spring into small pots of seed compost and place in a cold frame. Pot seedlings into individual pots and grow on. Seed will generally not come true (be the same) and plants from seed of variegated plants will be just one colour.

Propagation techniques
Other than damage to the leaves from slugs and snails, hostas tend to be trouble-free if grown in moist, fertile soil in some shade. They will not do well in a hot, sunny spot in dry soil. Brown and scorched leaves are common where soils get dry or where there is excessive sun. Replanting in a shadier place is the best long-term remedy.
Plants are disease-resistant. Slugs and snails can strip the foliage if precautions are not taken. Growing plants in containers may help, although vine weevil may then be a problem. An alternative is to stick to thicker-leaved cultivars, such as 'Devon Green', which are generally less eaten by slugs and snails.
Related links
Get involved
The Royal Horticultural Society is the UK’s leading gardening charity. We aim to enrich everyone’s life through plants, and make the UK a greener and more beautiful place.